Whether you call them space blankets, emergency blankets, survival blankets, solar blankets, or mylar blankets, they are useful in a lot of different scenarios. Some of this may be hype and marketing, at least when it comes to just how effective they are, but they are beneficial nonetheless.
What are space blankets?
Space blankets, originally evolving from NASA, are constructed from a super-thin material resembling aluminum foil. Mylar blankets are typically made from super-thin plastic and then coated with a reflective material. This simple combination of materials allows the blanket to reflect a high percentage of radiating heat.
With that in mind, it makes sense that the basic function space blankets are known for is keeping people warm. In a nutshell, they minimize the amount of heat a person’s body is losing by utilizing heat reflective properties.
They are super lightweight and take up minimal space when folded up. Because of this, they make a great addition to survival kits, first aid kits, bug out bags, get home bags, backpacking gear, and camping gear.
How to use a space blanket
Warmth
In reality, they reduce heat loss and do not assist your body in warming up. Space blankets reflect your body’s radiant heat back towards you to reduce heat loss and help regulate body temperature.
To be most effective, position yourself in a crouching position and wrap the space blanket around your entire body, including your head while making sure to leave enough exposure to prevent restricted breathing. You want to keep as much of the heat in as possible while keeping out the cold.
Shade from the Sun
Space blankets are a great barrier against the effects of direct sunlight. If set up properly, a space blanket can protect you from the sun while allowing you the opportunity to take advantage of any breeze that may be present.
To make an expedient space blanket sun shelter, follow these steps:
- Locate 4 trees spaced larger than the dimensions of your space blanket.
- Simply tie off each corner to a corresponding tree.
- Adjust the angle as needed depending on where the sun is in the sky.
* If four adequate trees are not available, make the best with what you have. 3 trees can be used, you would just have one loose corner.
Waterproof gear
In wet environments, you can use a space blanket to waterproof any gear you are carrying inside your backpack. In anticipation of rain, take the contents you need to keep dry and tightly wrap them in your space blanket. Once they are tightly wrapped, just put the bundle back into your backpack. Keep in mind, this is going back into your pack so you need to size accordingly.
Tent
In a pinch, or on purpose, you can set up a space blanket in a number of tent or shelter configurations. Here are a couple of ideas to get you going:
How to set up an A-Frame shelter

- Look for a location with two trees approximately 10 feet apart.
- Connect a guy line to each tree approximately 4 feet off the ground and make sure it is taught.
- Hang the space blanket over the guy line with an equal length hanging over each side.
- If your space blanket has grommets, you can use tent stakes or sticks to tightly secure each corner. If not, use a weighted object, like a rock, to hold the space blanket in place.

How to set up a Lean-to shelter

- Locate two trees and tightly stretch a guy line between them.
- Hang the space blanket over the guy line matching the corners.
- Pull the space blanket tight and angle it at approximately 30 degrees.
- Again, if your space blanket has grommets, you can use tent stakes or sticks to tightly secure each corner. If not, use a weighted object, like a rock, to hold the space blanket in place.

Emergency signaling

If you are in need of rescue during an emergency situation, a space blanket can be used as a signaling device. Use the metallic surface to reflect back towards rescuers.

Depending on the situation, you can cut off a small square of the space blanket for a more manageable signaling device. If you are in a bad spot and have to use your space blanket for other tasks as well, you may need to maintain the integrity of the blanket and use it in its entirety. If this is the case, just fold it up into a size you can handle and follow these steps:
- Use the reflective surface of the space blanket to cast a reflection onto an object nearby.
- Ideally, you could poke a hole in the middle of the blanket to aid in aiming, but this will also compromise its integrity.
- If you need to ensure the blanket can be used for other tasks, form your fingers into a V and cast the reflected beam of light through the V. This will allow you to locate the beam and will aid in aiming.
- Once you are able to aim the beam of light, direct it towards the target you are trying to signal.
Outside of the methods above, they can also be passively used to signal others. Even a basic A-frame tent setup can draw the attention of others.

The geometric shape and unnatural colors make a good contrast against mother nature. Even from above, they are easy to spot if there is enough visibility through the tree canopy.

Water collection
To use a space blanket for water collection, there are a number of techniques you can utilize:
- Use it to create a funnel into a container.
- Suspend it in the air with a small weight in the middle to use to funnel all the water to the center of the blanket. Be careful to prevent too much water from being collected or the weight may cause the system to fail while emptying all of the water.
- Use it to line a depression or low spot in the ground to catch rainwater.
- A less efficient technique would be to lay the blanket out to collect the morning dew. Once the dew has formed. Lift the blanket from the edges forcing all the water towards the center for collection.
Trail markers
If you are lost, more often than not, the best thing you can do is stay put. However, if you ever find yourself being forced to move, make sure you are not walking in circles. Small pieces of your space blanket can be tied in trees or other locations and make excellent trail markers due to their highly reflective nature. Keep in mind, if you use your space blanket for this application you have just removed it from being used in a lot of other applications.
Cordage
To make cordage or lashing, cut the space blanket into strips of your desired length and twist it into your desired tightness. Space blankets aren’t the strongest material on the planet so make sure your expectations are set accordingly.
Improvised tourniquet
First of all, you should have a properly vetted tourniquet to use when the situation arises. However, if that is not the case for whatever reason, you could attempt to use it as an improvised tourniquet. I say “attempt” because you would need to create a way to tighten the blanket to a point where it would stop blood loss. Again, it is not ideal and does not replace a proper tourniquet. However, it’s worth a shot if it is the absolute last option you have.
Sling
To make a space blanket sling, follow these steps:
- Cut a length of your space blanket approximately 40” square and fold it diagonally to form a triangle.
- Take one corner of the triangle and go under the arm and over the shoulder. Take other end and bring it up to the first corner on top of the shoulder. This should cradle the arm.
- Finally, tie both corners behind the neck. Make sure it is tied tight enough to support the arm.
Splint
How to make a space blanket splint
Use to make cordage, as noted above, and use the cordage combined with a stick, trekking pole, or another rigid item to immobilize potentially broken or broken limbs or fingers. Make sure the splint extends above and below the joints surrounding the injured area. If you can, add a layer of padding between the injury and the item you are using to stabilize the injury. Use the cordage from the space blanket to secure everything together.
Carry water
A space blanket can be used as a rudimentary method of transporting water. Most space blankets are thin, so you need to be mindful of how much weight is associated with the water you are collecting. To carry water from a water source to a separate location, simply collect all 4 corners of the blanket and submerge it in water. Make sure the blanket “balloons out under the water in order to open itself up to catching more water when retrieved. Keep all 4 corners together as you lift the blanket out of the water. If there is too much water trapped inside the blanket and it is getting too heavy, drain it until it reaches a manageable level.
Solar still
How to make a space blanket solar still
- Dig a small hole in the ground…the bigger the more water will be collected.
- Add anything that contains moisture into the hole: plants, vegetation, etc.
- Use something to collect water and place it in the middle of the hole.
- Place your space blanket, reflective side down, over the hole and anchor it down.
- Add a small weight, like a rock, to the center of the space blanket to direct the blanket towards your collection device.
- Collect your water once the process has run its course.
Heat reflector
To set up a heat reflector, hang your space blanket between two poles, sticks, or other vertical structures and make sure the reflective side of the blanket is facing the fire. You will sit on the opposite side of the fire in order to be on the receiving end of the equation. Be sure your blanket is far enough away from the fire to prevent damage from heat or embers.
Ground cover
To use a space blanket as a ground cover or groundsheet, place it underneath a layer of insulation like leaves, pine needles, or other vegetation. When combined with the insulating layer it can help provide some warmth while adding a waterproof layer between you and the ground.
Horseshoe pack
How to make a space blanket horseshoe pack
- Lay the blanket flat on the ground
- Add the items you need to carry to the middle of the blanket. The thin nature of space blankets will determine how much and what things you can carry.
- Roll the blanket into a tubular shape with the contents in the middle.
- Tie up both ends of the tube to prevent any contents from falling out. You can also tie reinforcement points around the wrap at various points to keep everything together.
- Tie a longer length of cordage to each end of the roll to make a shoulder or crossbody sling.
- Loop the sling across the body or shoulder and you are ready for business.
Clothing liner
You can line boots, shoes, gloves, or mittens, to add a layer of waterproof protection between wet clothing and your body. Cut your blanket to size and add them to the respective articles of clothing.
Poncho
First of all, do not cut a hole in the middle of your space blanket to make a poncho. It will severely degrade the longevity of the product and render it useless for many other applications. In a nutshell, wrap your body and head the best you can in the general pattern of a poncho. The main idea is to cover yourself in a way that prevents water from running down into the space blanket and getting your clothing wet. The added bonus of blocking the wind will aid in the prevention of hypothermia if those conditions are present.
Hammock insulation
You can use a space blanket to create a windproof barrier between the hammock and your sleeping bag. Place the space blanket down in your hammock and lay your sleeping bag on top of it. It will help block cold drafts from the bottom and assist in reflecting heat back towards your body.
Make sure you weigh the benefit of what you are using your blanket for against what you will not be able to use it for. In other words, if you cut it up to use as trail markers, you have lost your ability to use it to create a shelter. Most are disposable in nature and will not provide long term durability.
Also, when you are purchasing your space blanket, be cognizant of the color or pattern you want to utilize opposite of the reflective side. Do you want something with a camouflage pattern or something with a bright color?

Make an educated choice based on your intended application. Heck, they are lightweight enough…why not get one of each?
Add ons
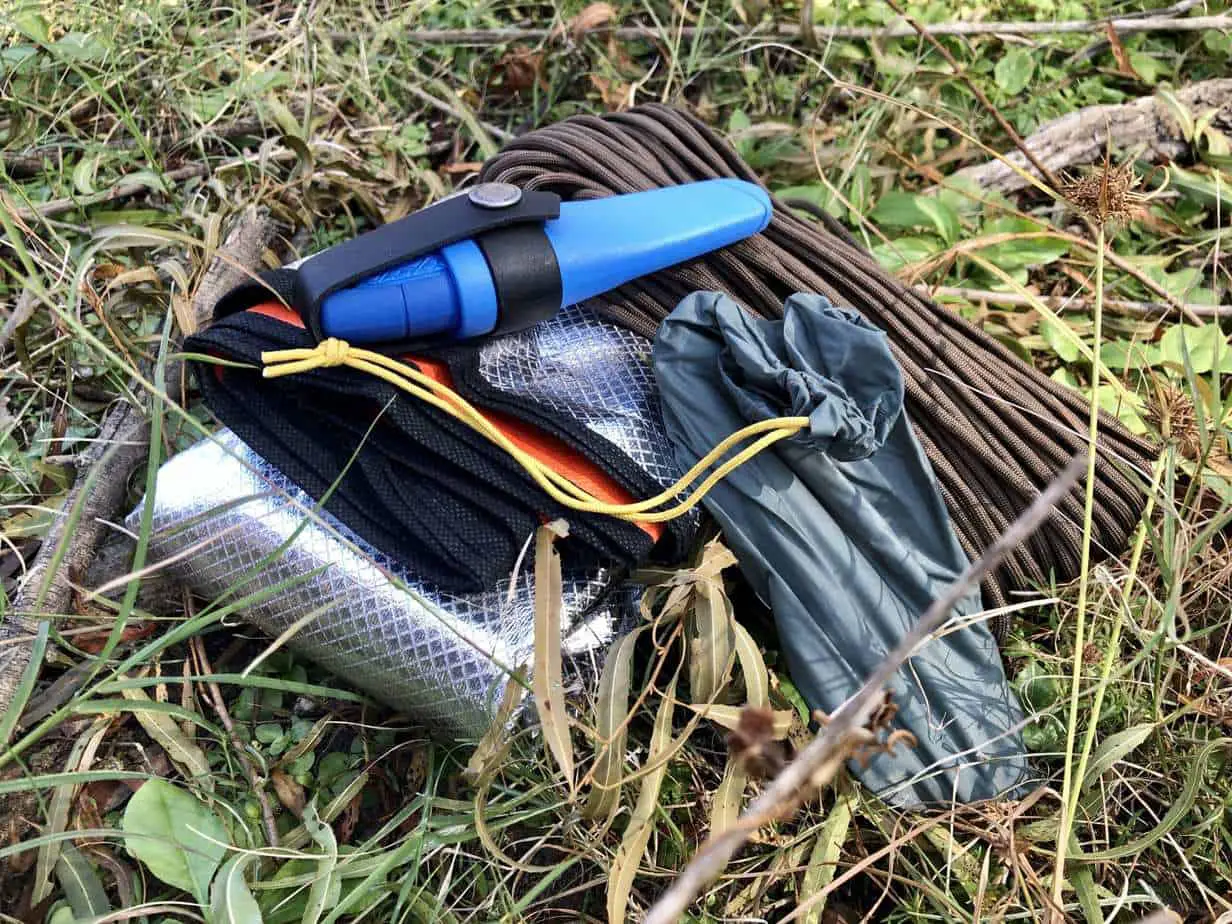
If you are carrying a space blanket for one of those “what if” situations, you should make sure you have any extra items needed to hastily construct whatever you’re constructed. For me, I want to make sure I have a knife, paracord, and 4 tent stakes.

Yes, I could make some stakes or pegs in the field, but I don’t really want to be wasting time on something like that if I’m trying to beat a storm or get out of the cold. I prefer lightweight stakes that are small enough diameter to fit through the grommets on my space blanket.

You can also pre-cut and tie appropriate lengths of paracord onto the blanket via the grommets ahead of time. This can aid in a faster setup, especially if you have an idea of how and what you’re going to build.
Conclusion
In summary, space blankets are a lightweight, minimalistic tool. They are not designed for long-term, extended, hard-use applications. However, they can be very useful when you find yourself in a bad spot. The idea of this list is to simply open your eyes to the many potential uses. There are many more ways they can be utilized and you are only limited by your imagination.
If you have additional uses you are fond of using, feel free to share.